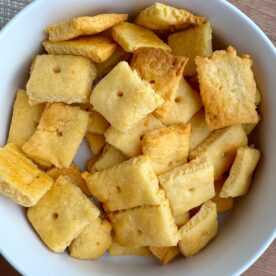
Homemade Cheez-Its
on Feb 28, 2024, Updated May 22, 2025
This post may contain affiliate links. Please read our disclosure policy.
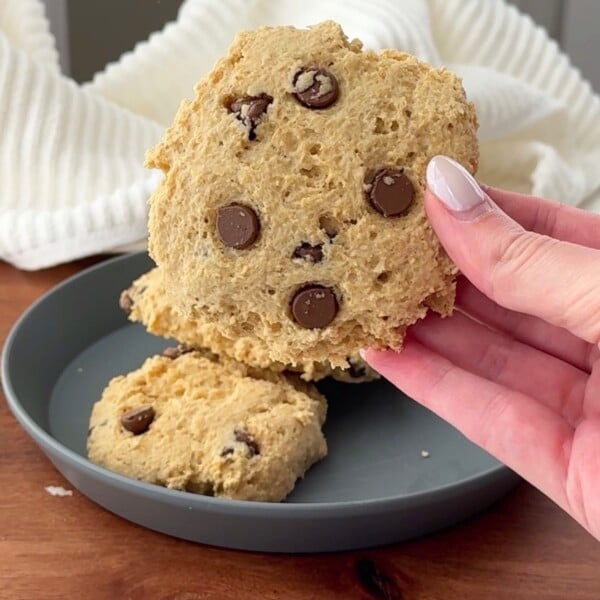
Looking for a healthier version of your kid’s favorite snack? These Homemade Cheez-Its are a crispy, cheesy, and totally toddler-friendly alternative to store-bought crackers. Made with real cheddar cheese and just five ingredients, these DIY Cheez-Its are perfect for lunchboxes, after-school snacks, or sharing during family time. Plus, they’re free from preservatives and packed with flavor. Involving your kids in the baking process can be a great way to spend quality time together in the kitchen.

Why Homemade Cheez-Its are Great for Toddlers and Families
- Control over Ingredients: By making these snacks at home, you have full control over the quality of ingredients, ensuring a healthier option for your family.
- Nutritious and Delicious: Despite their cheesy flavor, these Cheez-Its are made with real cheddar cheese and contain no artificial additives or preservatives.
- Fun to Make: Get your little ones involved in the kitchen by letting them help with the mixing, rolling, and cutting of the dough. It’s a great way to teach them about cooking and foster their love for homemade food.
- Easy Snack: These cheese crackers are perfect for packing in lunchboxes, serving as an after-school snack, or enjoying on-the-go during family outings.
Ingredients
- 8 oz sharp cheddar cheese, shredded
- 1 cup all-purpose flour
- 1/4 cup butter, at room temperature
- 1/2 tsp salt
- 2 tbsp cold water
How to Make Baked Homemade Cheez-its
- In a food processor, blend together the shredded cheddar cheese, room temperature butter, and salt until well combined.
- Add the all-purpose flour to the mixture, pulsing until it becomes crumbly.
- Add the cold water until a smooth dough forms.
- Remove the dough from the food processor and shape it into a ball. Wrap the dough in plastic wrap and refrigerate for 30 minutes.
- Preheat your oven to 375°F (190°C) and line a baking sheet with parchment paper.
- Once chilled, roll out the dough until it is about 1/8 inch thick.
- Using a knife or pizza cutter, cut the dough into small squares. For added authenticity, poke a hole in the center of each square using a chopstick or toothpick.
- Place the squares onto the prepared baking sheet and bake for 15 minutes, or until they start to turn golden brown.
- Allow the homemade cheez-its to cool before serving. Enjoy!
Substitutions
Cheddar Cheese: Feel free to experiment with other cheeses like Colby, Monterey Jack, or a dairy-free cheese for dietary needs.
Butter: Swap with plant-based butter or margarine for a dairy-free version.
Flour: Use a gluten-free all-purpose flour blend to make the crackers gluten-free.
Salt: Adjust the amount to taste or use a salt substitute if needed.
Add-ins: For extra flavor, consider adding a pinch of garlic powder, paprika, or anything else to the dough.
Storing Leftover Homemade Cheese Crackers
Store any leftover Cheez-Its in an airtight container at room temperature for up to one week, if they last that long without being devoured by your little snackers! You can also freeze the dough for up to a month.
Common Questions
Can I make these healthy cheez-its without a food processor?
- Yes! While a food processor makes the process quicker, you can mix the dough by hand or use a pastry cutter.
How can I freeze the dough?
- Wrap the dough tightly in plastic wrap and freeze for up to a month. Thaw in the refrigerator before rolling out and baking.
Can I make these homemade cheez-its with other cheeses?
- Yes you can! Feel free to use your favorite cheese! I use sharp cheddar for the rich flavor.
More Healthy Snack Ideas for Kids
2-Ingredient Apricot Bars – These 2-Ingredient Apricot Bars are naturally sweet, soft, and toddler-approved. Made with just dried apricots and coconut, they’re a no-fuss snack or breakfast bite you can feel good about serving. No added sugar, no baking required—just simple, wholesome ingredients.
Spinach Muffins – These Spinach Muffins are a delicious way to sneak in greens! Naturally sweetened and full of soft, fluffy texture, they’re perfect for toddlers and picky eaters alike. Great for breakfast, snack time, or packed into a lunchbox, they’re a veggie-loaded win.
Healthy Banana Chocolate Chip Ice Cream – This Healthy Banana Chocolate Chip Ice Cream is a creamy, naturally sweet treat made with just frozen bananas and chocolate chips. It’s dairy-free, toddler-friendly, and comes together in minutes—no ice cream maker required! A perfect warm-weather snack or healthy dessert.
Strawberry Oat Cups – Strawberry Oat Cups are soft, fruity, and perfect for little hands. Made with oats, fresh strawberries, and no refined sugar, these baked cups are ideal for breakfast, snack time, or lunchboxes. They’re easy to make and freezer-friendly for busy families.
Healthy Sweet Potato Muffins – These Healthy Sweet Potato Muffins are soft, spiced, and naturally sweetened—perfect for toddlers and adults alike. Packed with fiber and nutrients, they make a great snack, breakfast, or lunchbox addition. Bonus: they freeze beautifully for batch prep!
I hope you love this homemade cheez-it recipe as much as my family does! If you do, tag me @reallittlemeals so I can see your yummy creations!
Homemade Cheez-Its
Ingredients
- 8 oz sharp cheddar cheese, shredded
- 1/4 cup butter
- 1/2 tsp salt
- 1 cup all purpose flour
- 2 tbsp cold water
Instructions
- In a food processor, blend together the shredded cheddar cheese, room temperature butter, and salt until well combined.
- Add the all-purpose flour to the mixture, pulsing until it becomes crumbly.
- Add the cold water until a smooth dough forms.
- Remove the dough from the food processor and shape it into a ball. Wrap the dough in plastic wrap and refrigerate for 30 minutes.
- Preheat your oven to 375°F (190°C) and line a baking sheet with parchment paper.
- Once chilled, roll out the dough until it is about 1/8 inch thick.
- Using a knife or pizza cutter, cut the dough into small squares. For added authenticity, poke a hole in the center of each square using a chopstick or toothpick. Place the squares onto the prepared baking sheet and bake for 15 minutes, or until they start to turn golden brown.
- Allow the Homemade Cheez-Its to cool before serving. Enjoy!
Notes
Nutrition
Nutrition information is automatically calculated, so should only be used as an approximation.
I just made a batch and they turned out just great. They are delicious and my son can’t get enough of them.
Do you think I could freeze the dough?
Thanks for the fantastic recipe
These were so so good, I was shocked!
I had little hope that they would taste like the real thing, but they tasted even better.
Three notes:
-Use a good quality cheddar for extra flavor
-I’m not sure if it’s because I used a ninja blender vs a food processor, but 2 tbsp of water was not enough to make a workable dough. I hand mixed in an additional tablespoon.
-Rolling out a slightly thicker dough yields a light puff pasty texture in the middles, which is delicious!
My family and I love these, and we make them weekly! We use all clean ingredients and even switch up the type of cheese we use sometimes. 🧡